Self-Sufficiency Sundays: Stack Your Functions!

In Permaculture lingo, “stacking functions” refers to building redundancies into a sustainable garden. In a forest, a tree doesn’t just do one thing; instead, it performs multiple jobs, like regulating climate, sequestering carbon, holding soil together, providing habitat, and giving food, just to name a few. One of the problems with industrialized society is that almost every aspect of our lives is specialized – there are shockingly few things we do or have that that perform more than one or two functions. This is especially true in our food and habitat (for most of us, houses and apartments), and it leads to an incredible amount of waste. Imagine if forests needed a separate organism to do each and every single job that one tree can easily perform.

Take, for example, a lawn. The lawn is pretty much the epitome of wasted space. Most of the time, it performs one single function: looking nice (if you like the way lawns look, something I personally can’t wrap my head around). Sometimes – sometimes – it also serves as a recreational area, so that’s two functions, which wouldn’t be so bad if lawn wasn’t the single largest crop in the United States. If you add a hedge to the edge of it to make it look nicer, you again have a plant that probably only serves one function – and notice that they don’t help each other out very much. If you find it impossible to keep your lawn healthy, this wasted space and lack of relationships is the reason why. Lawn is a monoculture, and there’s a reason monocultures never occur in nature.

To build a truly ecological garden, you need to make sure that all your plants are performing multiple tasks (and that all tasks are being done by multiple plants – more on that in a minute). For example, if you’re a fan of flowers, don’t just get a variety that looks nice. Try to find a flowering vegetable or perennial herb, or a creeping vine that acts as mulch or shades a window, or an edible flower like nasturtiums, or a flower that feeds and creates habitat for beneficial insects and spiders. If you’re growing vegetables, go for natural configurations that help the plants help each other. The most often cited example is the Three Sisters garden, in which squash, corn, and beans help keep each other healthy through mutually beneficial relationships. The corn provides a stalk for the beans, the beans fix nitrogen in the soil, and the squash acts as mulch. See The Urban Homestead or Gaia’s Garden to learn how to do it, or check out Kai Chang’s blog for updates on his garden. Another way to stack functions is through a polycultural bed, in which seeds are scattered so that vegetables come up in no particular pattern. The random placement of beans means that you don’t need to rotate your crops to amend the soil, and the close proximity of plants shades the ground so that the temperature is regulated and moisture is preserved. Again, see Urban Homestead or Gaia’s Garden.

Think about stacking functions in terms of landscaping, too. Why plant some anonymous hedge when a rosemary bush is edible and produces adorable flowers? If you’re looking for border plants, why not plant strawberries or chives, both of which also flower? If you never use your lawn, why have one at all? Edible landscaping, polycultural beds, or a fruit or nut tree can look just as nice (better, in my opinion) as grass. And if you take your climate into consideration when you’re planting, it’ll take much less work to care for your garden.

It’s also important to make sure that multiple plants are meeting a particular need, in case something happens to one of them. If you want to grow food, don’t just grow one plant or type of crop – if it gets a disease, then there goes all your work for the season. If you live in a dry climate, don’t rely on just one source of water – use multiple irrigation and conservation methods, like a soaker hose, thick mulch, a cistern, and berms and swales.

To reduce waste, try to stack functions in the rest of your life, too. One example from my own life is transportation. When I drive my car unnecessarily, I’m wasting both gas and time; notice that the car is only performing one function. If, however, I ride my bike, now I’m getting exercise while I travel. If I ride the bus, I can read or grade papers. If my destination is close enough to walk to, then I can listen to a Yiddish tape while I exercise and travel. Note that since most people reading this blog probably live in a car culture, the car makes sense, for now, if you’re in a hurry or if you need to carry a lot of stuff. However, since the earth doesn’t contain enough resources to sustain car cultures indefinitely, consider the virtues of animal transportation – a horse will give you fertilizer and companionship in addition to healthy transportation. (Horseback riding is a workout, right? It looks like it, at least.) Also note that this form of stacking functions shouldn’t turn into an addiction to multitasking. If you’re doing more than you can comfortably concentrate on, or if it’s stressing you out, then you are canceling out the good effects of your functions.

Conversely, living in a place that gives me the option of walking, biking, taking public transportation, or driving is an excellent system of redundancies. If my car or bike is in the shop, or I’m temporarily disabled, or I don’t have time for the bus, I still have plenty of options. I’ll never be completely stranded as long as I’m traveling within my city.

Another area of your life in which you should stack functions is food. Over the past century, we’ve developed a bizarre system in which, generally speaking, pleasure and nutrition are separated from each other. We eat fast food and chips and then buy vitamin supplements. We choke down iceburg lettuce and then crave cookies and soda. The whole reason we have a sense of taste is because a good taste, absent artificial ingredients, signals good nutritional content. If the food you’re eating isn’t both pleasurable and nutritious, then there’s a problem. It’s probably not your fault, especially if you’re low-income, but it’s a problem nonetheless. Western culture needs to drastically change its food system.

Finally, think about stacking functions in terms of space and garbage. If you have one room in your house for the guest bed, one room for each child, one room for eating, one room for watching TV, one room for entertaining guests, and one room for working on the computer, then you have too many rooms. (Full disclosure: I myself currently live in an apartment with too many rooms.) Like the lawn, all this wasted space creates a lot of unnecessary work. Can you put your desk in the guest room? Do you need both a living room and a den? Similarly, if you use a disposable cup once, for fifteen minutes, and then throw it away, that cup has only performed one function in its entire lifetime. Use a glass instead – or, at the very least, compost the disposable one and feed it to your plants. If the cup isn’t compostable because it’s plastic or has wax or poisonous dyes or whatever, then that’s a bad system.

Of course, the idea of cutting down on garbage is hardly revolutionary – but in practice, it can be maddeningly hard to pull off. This is why the best way to really start stacking your functions isn’t to simply pat yourself on the back for using canvas bags at the grocery store or travel mugs at the coffee shop, but to honestly evaluate every single object you use. If it only performs one function – or if it’s not reusable or even biodegradable – then it’s wasting space and resources. Once you realize that, you can begin figuring out what to do about it.

Food, Food, Food

I’ve realized that food justice and eco-kashrut has made me kind of a foodie. I never thought the label applied to me – when I think “foodie,” I think “pays $30 for a jar of olives and then cooks for two hours” – but I’ve become addicted to the alchemy of cheesemaking, the creativity that comes out of figuring out what to do with the contents my CSA box. Each loaf of bread I bake comes out slightly better (although there’s nothing I can really be proud of yet). I love following the rhythms of growing seasons – although it’s pathetic that that’s some sort of novel concept – and throwing together a good, healthy meal. I grew up on KFC, Panda Express, and supermarket beef, but this week my husband and I made beet soup and okra with lemon, not because we searched out the recipes and then went shopping, but because beets and okra were what we had.

So when I saw that there’s a Jewish food conference happening in California next winter, I nearly jumped out of my seat. First off – a conference on the West Coast!? Isn’t there some law against that? You mean people in California actually exist? Secondly, this conference isn’t just about Jewish food and kashrut – it’s focused on issues like nutrition, food justice, and eco-kashrut. Right up my alley.

But there are a few problems. First off, judging from the description and last year’s schedule, it seems like more of a retreat than a conference. Lots of movie screenings and baking classes; not a huge number of workshops on how to get things done. I’d love to learn how to bake challah… but I’d rather spend that morning strategizing with other food activists on how to dismantle industrial agriculture, and then get their numbers and bake challah some other time. Furthermore, there doesn’t seem to be any way for participants to put together workshops or panels – the programming is completely controlled by the organization putting it on. Finally, the price tag for registration is – wait for it – $280, set to go up to $360 in August. Compare this to AMC’s $100, J Street’s $175.

So if good food is something that supposedly only upper-middle class Jews care about, then what does that say about how they perceive other Jews? If food comes out of the ground for free, and yet somehow it takes $360 a head to get together and talk about it, what does that say about their relationship to food? If they need the money because they’re going to spend four days holding cooking demonstrations and preparing meals – well, yum, but again, that’s not a conference.

Also, notice the date? The conference starts on Christmas eve. I can understand wanting to choose a date when most Jews are going to be free, but holding an event on the single most important holiday in the country in which we live ignores the reality of those of us in or from interfaith and multiethnic homes. If I went, I’d have to drive up to the Bay Area early Christmas morning to have dinner with my husband’s family, then drive back down to the conference that night.

There are a few scholarships available, so I’ll probably apply for one and then make a decision depending on what I get. Maybe I can meet some other scholarship people there (something tells me that I wouldn’t have much in common with the people who could afford the ticket on their own). But still – if this is how the progressive Jewish community approaches food issues, then the eco-kashrut movement does not exist.

Self-Sufficiency Sundays: Make Ricotta Cheese!

A name like Self-Sufficiency Sundays doesn’t necessarily mean every Sunday, right? Or even most Sundays? Maybe I’ll rename it Self-Sufficiency Whenever the Hell I Feel Like It.

Okay, in all seriousness, I got waylaid for quite awhile with about ten futile attempts to make whole wheat bread. The recipe I’ve been trying over and over again – the basic whole wheat recipe from The Laurel’s Kitchen Bread Book, just doesn’t work with the flour that’s available to me. After kneading the dough for about 20 minutes, it’s supposed to become smooth and elastic; if the gluten strands remain brittle after that, the book says, you’re working with old, bad flour. Laurel must live on top of a mill or something, because I’ve tried it with three different kinds and not a single loaf has risen properly. But I’m going to try another recipe that calls for gluten flour and the creation of a sponge, so while I’m annoyed at having to buy more processed ingredients, I guess I can’t escape the food system in which I’m working.

But in the midst of my latest whole wheat loaf of disappointment, I managed to cheer myself up by making my own cheese. My husband and I went camping last weekend and left behind a half gallon of milk that I’d just bought, forgetting that we were about to leave town. The milk would have just gone bad if The Urban Homestead hadn’t had a whole section on dealing with abundance, and so I was able to give the milk a second life when we got home. (Note: the milk hadn’t yet spoiled, although it was close to it. Please don’t try this with spoiled milk.)

This recipe is incredibly simple. You’ll need:

1/2 gallon of whole, unpasteurized milk
1/4 cup of lemon juice
1/2 tsp of salt
muslin or finely woven cheesecloth
thermometer

Stir the lemon juice and salt into the milk and heat it to 185 degrees, stirring all the while. You’ll start to notice curds forming pretty quickly; as soon as it reaches 185, take it off the heat and let it stand for 10 minutes. Meanwhile, line a colander with the muslin or cheesecloth. Carefully ladle or pour the curds into the cloth, tie up the corners to form a bag, and let it drain for 30 minutes.

That’s it! You’re a cheesemaker!

I only just did this a couple of days ago, so I haven’t actually eaten any of my ricotta yet. Looks legit, though. If you want a savory cheese, mix in olive oil and herbs. For sweeter cheese, use honey and spices. A half gallon of milk doesn’t produce a whole lot of cheese – not enough for standards like lasagna – so I’m going to use mine to make an appetizer from Deborah Madison’s Vegetarian Cooking for Everyone: crostini with ricotta, olive paste, and marjoram. Then I’ll sip Chianti and talk about the latest New Yorker article while I eat it! How divine!

my garden

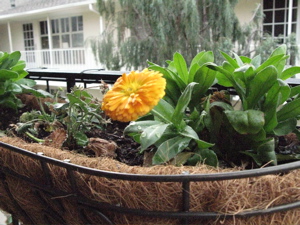
Image description: close-up of a calendula blossom in a basket hanging from a rail.

Image description: close-up of a calendula blossom in a basket hanging from a rail.


Continue reading

Self-Sufficiency Sundays: Grow Some Beans!

I CAN’T BELIEVE HOW EASY IT IS TO GROW BEANS.

I just can’t believe it.

I planted some pole peans in pots in my window a few weeks ago ago to see if it’d be feasible to create a natural, edible curtain (see The Urban Homestead for a more detailed description) and they’ve gone from seedlings to this:

Image description: three beanstalks in a windowsill.  One of them reaches the top of the window.

Image description: three beanstalks in a windowsill. One of them reaches the top of the window.

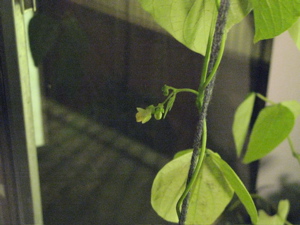
Sorry for the bad photography – my mom gave me an expensive digital camera and I don’t know how to work it. But incredible, right? These things have been growing a couple of inches a day. Even better, they’re self-seeding (meaning they don’t need to be cross-pollinated by bees and other insects), so they start producing fruit as soon as they’re mature. Here’s one of the little flowers that started forming once the stalk was a few feet high:

Image description: a small yellow and white flower.

And here’s a wee bean that emerged when the flower died.

littlebean

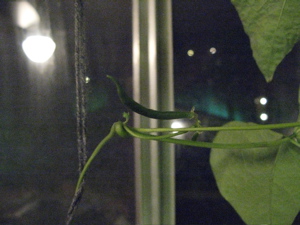
Here’s the bean now!

beancloeup

Stir-fry, here we come.

Now, I have this problem wherein any vegetable I try to grow in a pot turns into a bonsai vegetable – so far, I’ve given up on my bonsai spinach, bonsai lettuce, and bonsai scallions. Some problem with root space, I guess, I don’t know. So I’m bracing myself for the possibility that these beans won’t get any bigger. If they do, though, I’ll have to get some stronger strings.

To grow your own bean curtain, you’ll need:

– runner beans (NOT bush beans)
– enough large pots to cover a windowsill
– potting soil
– a paperclip
– a ceiling hook or nail
– yarn, twine, or other thick string

Beans will only germinate in warm soil, so choose a sunny south-facing window. (Planting them here has the added benefit of deflecting sunlight and cooling your house in the summer. Just make sure you don’t bake them – beans don’t produce much when it’s too hot.) Plant them about an inch deep in damp (not soggy) soil. Unfold the paperclip so that it looks like a U, and stick it into the soil about an inch away from the bean so that there’s a little metal loop sticking up. Feed the string through the loop and tie it onto the ceiling hook. (Right now I’m using pushpins, which I know is an astronomically bad idea. I’m currently searching for alternatives that won’t get me in trouble with the landlord.)

That’s… uh, pretty much it, actually. Keep the soil moist (dig down a couple of inches before you water it, since surface soil is often much dryer or wetter than deeper soil), give it a little organic potassium-rich fertilizer if you want, and just watch the magic happen. Remember to pick each bean when it’s still young and tender. The flavor will be better that way, and the plant will keep producing as long as it perceives its beans disappearing.

If you’ve got a yard, you can build a bean teepee. Just take a bunch of long poles, stake them into the ground and tie them together on top, and plant 3 or 4 beans around the base of each one. If you make several small ones, your kids will love you forever, and if you make one big one, you can spend your May weekends reading Walden in your leafy getaway.

Or, if you live in a warm climate, consider using runner beans for Sukkot. You’ll have to do some advance planning here. Build your sukkah out of trellises or poles about two months before Sukkot, and plant the beans around them. You may want to hold off on the roof at first, just to make sure the beans get enough sunlight. If all goes well (keep in mind I’ve never tried this), the walls will fill themselves in gradually, and you can eat your first harvest on the first day! After the vines have stopped producing, simply use them for mulch or compost when you tear down the sukkah. I know having your sukkah up for like three months is a significant departure from Jewish tradition, but I mean, hey, beans. Just think about that. Besides, Sukkot is a harvest festival anyway, and there’s something beautiful about shelter that builds itself.

In conclusion, beans beans beans, I love them. The end.

Self-Sufficiency Sundays: Grow Herbs From Seed!

From Little Herb Gardens by Georgeanne Brennen and Mimi Luebbermann:

The almost-instant gratification received from growing arugula, cilantro, or dill is reason enough to plant them. Each sprouts and grows quickly. Arugula leaves pop through the soil in three or four days. Success appears before your eyes. Cilantro emerges shortly thereafter, in five or six days, while feathery dill tips come through the soil in about ten days. Any of the three can be put to use within a few weeks, to flavor salads, soups, and sauces and to sprinkle on pizzas and sandwiches. Grow any or all of these herbs in small, window-sized pots, and replant with fresh seeds after a couple of months. A steady supply of succulent, tender leaves is your reward. Spring and fall produce especially good harvests. All three herbs quickly send up central stalks, flower, and go to seed during summer, and in winter germination is slower. Arugula is also called rocket, garden rocket, and roquette. Cilantro is also known as Chinese parsley and coriander. Continue reading

Self-Sufficiency Sundays: Grow Some Lettuce!

From The Urban Homestead by Kelly Coyne and Eric Knutzen:

This is a good first project for a beginning farmer. Lettuce is easy to grow, and tastes so much better homegrown than from a bag. Better still, it is always fresh when you want it, instead of rotting in crisper drawer (sic).

It is easiest to grow lettuce in cool (but not freezing) weather. Lettuce is not a sun worshiper. In climates with freezing winters, you should plant lettuce in the early spring. In warm climates you can plant it in the fall as soon as the summer heat dies down, or any time over the winter.
Continue reading

Self-Sufficiency Sundays: Propagate Some Mint!

I didn’t know this until about a year ago, but there are plants out there that will just grow new roots when you put a cutting in water. Can you believe that? They just grow roots! Like from anywhere! That’s unbelievable!

Mint is an invasive species – meaning, basically, that it’s a very nice tasting weed – so growing new mint plants from an existing plant couldn’t be easier. One day my husband spotted some mint growing by the side of our apartment building; the owner mowed it down several times but it always sprang back up, so finally I cut off a couple of 4″ long stems and stuck them in two inches of water. Within a couple of weeks, they’d sprouted little roots; about a week after that, the root systems were about an inch in diameter, and the plants were ready to transplant into soil. After they were established, I took cuttings of those and made a third plant.

That’s really all there is to it. Cut off a branch, put it in water, and wait for it to grow roots. This doesn’t work with all plants – I’m currently trying it with a sage cutting, with no results – but it works with many. If you want to give your cuttings a boost, you can buy rooting hormone and apply it to the bottom of the plant.

If you can’t find mint growing wild, go ahead and buy a small mint plant and take cuttings whenever it gets big enough. Remember that if you want a steady supply of an herb, one small plant isn’t going to be enough; you really want to have a few plants (or one gigantic one, in the case of, say, rosemary) growing at any given time. So propagating can really come in handy.

When the root system looks pretty established, dig a small hole in moist soil and set the plant in, covering the topmost roots entirely (you may have to pinch off a couple of lower leaves). The plant may wilt at first; you’d be vulnerable, too, if you were going through a major life change. Just give it a few days and it should perk back up. Once the plant starts growing, you can get busy making mint juleps with the leaves.

You may want to save your first mint julep for when you get that first gig at the bar down on 26th Street – not the one with all the stickers on the door, but the one with that weird vinyl-covered wall. You’ve been practicing really hard for a year, and this is an important break for you. Drink another mint julep just before you get up onstage. That way, audience members will know you as that lead singer who drinks mint juleps.

Make yourself another mint julep when you land your first record deal. This will be an especially symbolic day, because your spouse will have just left you for your (now former) drummer. No, it’s not his fault – no one should ever be forced to live a lie. Still, though, you feel a tiny but dangerous spark of rage when you think of the concerts you’ll be playing without him cheering you on. Go ahead and make another mint julep. You’ve earned it!

On the tour bus, start a few more cuttings going so that the plants will be established by the time you hit Chicago. You’re going to need them to keep up with all those mint juleps. Try not to think about the spouse. You think you see him at a rest stop in Colorado, blowing a lonely jet of smoke into the misty night, and next thing you know you’re clawing at empty space while your band members frantically hold you back. Don’t worry – you’ve got one mint plant that’s still producing enough for a julep. Make that julep. When you feel the guitarist’s hand on your shoulder, shrug her violently away.

Fame is hard on the soul. Mint juleps ease the pain. At age 47, surrounded by your jacuzzi full of champagne and your sixty thousand grammy awards and your marble staircases imported from Italy, lovingly stroke the leaves of your latest transplant and then drop them into that cool, sweating glass. As you wander through your smoking room nursing your mint julep, think fondly of that very first spearmint plant you found poking through a sidewalk crack in Culver City. Your footsteps clack miserably in the halls; only the butler is there to hear you. How loyal that mint has been to you. How loyal.

One quick note on mint: it prefers shade and moist soil. Don’t set this out next to your basil, or you’ll fry it – I forgot to water one of mine for about a week, and lost about four mojitos’ worth of harvest. Oh, those would have been good.

Self-Sufficiency Sundays: Grow Cat Grass!

Readers, I am totally stoked because now, today, at this moment, I’m unveiling a new feature to get you all fired up about eco-kashrut: Self-Sufficiency Sundays.

What exactly is self-sufficiency? In activist terms, it’s a process of disengaging yourself from the habits and lifestyles that are fostering oppression and destroying the environment. Don’t ruin the lives of indigenous peoples in South America and poison multiple climates with chemicals and jet fuel so that you can have a banana in January – choose the food you eat based on seasons and regions, and then start growing your own. Don’t fuel unbridled capitalism and deplete resources in order to use crappy furniture from Ikea and Target – learn simple carpentry and restoration techniques so that you can make your own. Self-sufficiency is, in the (paraphrased) words of Permaculture founder Bill Mollison, learning how to stop depending on the very power structures you’re trying to dismantle.

My main interest is gardening, so most of my posts will center around growing food. However, self-sufficiency expands far beyond producing crops, and I’m going to try to reflect that here. Most of what I post will come from books or other web resources, often directly reprinted.

A quick note (which I’ll probably stick to the beginning of every SSS post): I’m a relative novice at this stuff. Please! Post additional advice and corrections in the comments, and consider these posts collaborative ventures rather than lectures.

Anyway, cat grass. I’m choosing this as my first topic because it’s a great project for people who are interested in gardening, but are afraid to try growing things from seed, either because they live in an apartment or because they have trouble keeping houseplants alive. Cat grass is not only useful – cats need greens as part of their diet, and providing grass alongside their food will keep them away from other, potentially dangerous plants – but frighteningly easy to grow. Starting with it will give you a chance to observe what seeds look like when they’re germinating and sprouting, and help build a little confidence for when you decide to move on to plants that humans like to eat.

You’ll need:
1 packet of cat grass seed
2 4″ pots per cat (so if you have 2 cats, 4 pots)
water
potting soil
an opaque cover, such as an old saucer or lid
a spray bottle and compact florescent lamp (optional)
a cat is probably helpful

The type of grass that cats like is oat grass (although wheat and barley are also possibilities). You don’t even need to worry about that, though, because garden stores sell packets of cat grass seed right between the carrots and the cilantro. Fill the first pot with potting soil and water. The soil level will sink; fill the pot again until the top of the soil is a little under an inch from the rim of the pot. Sprinkle on a 1/4 inch thick layer of seeds – you shouldn’t see much soil once they’re in – and mix them into the top inch of soil. Sprinkle about a 1/4 inch of soil on top of them, so that they’re mostly covered. Moisten the top layer of soil. The spray bottle works well for this.

Cover the pot with the saucer or lid and keep it away from light for a day or two; the seeds need darkness to germinate. When you see little tips poking out of the soil, put the pot in a sunny place. If you don’t have any sunny spots (with winter approaching, I haven’t seen any evidence of the sun in several days), shine the compact florescent light on the seeds for several hours each day.

When the grass is four inches tall, put it down next to your cat’s food. Remember to keep the soil moist – if you pick up the pot and it feels light, that means it needs water. Don’t let the soil get soggy, though, and don’t let too much water run out of the drainage holes in the bottom, because that washes away nutrients. (I learned that lesson the hard way, after weeks of growing yellow spinach and white dill.) The soil should feel like a wrung-out sponge when you touch it.

Eventually, your grass will wither and die; so goes the life of cat food. After a week or so, just before the tips start to turn yellow, take the other pot and start over. One seed packet should contain enough seeds for several plantings. Alternate between the two pots to make sure your cat always has grass available.

If you’re really ambitious, you can learn how to get oat grass to go to seed and cut out the trip to the garden center. I haven’t gotten that far, although I am uncomfortably aware of the fact that our seeds are probably coming from the same environmentally and socially destructive monoculture farms as our produce. (More on monoculture versus polyculture in a few weeks.)