Self-Sufficiency Sundays: Wash Your Hair!

Did you know that a lot of shampoos contain the exact same cleaning agents as laundry detergent? Sulfates and other harsh cleaning agents work by stripping your hair of all its nutrients and oils. If you have curly hair, which is usually pretty dry, this leaves it brittle and exhausted. Then you have to put in loads of conditioner to undo the effects.

Screw that. Here’s a recipe for a homemade cleanser from Lorraine Massey’s Curly Girl, which I found out about from the lovely Whit. Simply take the juice of one large lemon, mix it with your usual amount of conditioner, and pour it through your hair. (I like to massage it in a tiny bit.) Then rinse it out.

“But wait!” you might be thinking. “You still have to use store-bought conditioner! That’s not self sufficient!” I’ll admit that I myself use store-bought conditioner on my hair. But you don’t have to! The Internet is full of conditioner recipes.

Curly Girl also contains instructions for using baking soda and water to clear out product buildup. I found the lemon recipe more effective, though. If your hair is really dry, you may only have to use the lemon rinse once or twice a month (although you should still cleanse your scalp every few days – see the book for details). And remember that your scalp produces natural oils for a reason. If the tiniest hint of oil around your roots is unacceptable, then that says more about your culture than your hair.

Self-Sufficiency Sundays: Stack Your Functions!

In Permaculture lingo, “stacking functions” refers to building redundancies into a sustainable garden. In a forest, a tree doesn’t just do one thing; instead, it performs multiple jobs, like regulating climate, sequestering carbon, holding soil together, providing habitat, and giving food, just to name a few. One of the problems with industrialized society is that almost every aspect of our lives is specialized – there are shockingly few things we do or have that that perform more than one or two functions. This is especially true in our food and habitat (for most of us, houses and apartments), and it leads to an incredible amount of waste. Imagine if forests needed a separate organism to do each and every single job that one tree can easily perform.

Take, for example, a lawn. The lawn is pretty much the epitome of wasted space. Most of the time, it performs one single function: looking nice (if you like the way lawns look, something I personally can’t wrap my head around). Sometimes – sometimes – it also serves as a recreational area, so that’s two functions, which wouldn’t be so bad if lawn wasn’t the single largest crop in the United States. If you add a hedge to the edge of it to make it look nicer, you again have a plant that probably only serves one function – and notice that they don’t help each other out very much. If you find it impossible to keep your lawn healthy, this wasted space and lack of relationships is the reason why. Lawn is a monoculture, and there’s a reason monocultures never occur in nature.

To build a truly ecological garden, you need to make sure that all your plants are performing multiple tasks (and that all tasks are being done by multiple plants – more on that in a minute). For example, if you’re a fan of flowers, don’t just get a variety that looks nice. Try to find a flowering vegetable or perennial herb, or a creeping vine that acts as mulch or shades a window, or an edible flower like nasturtiums, or a flower that feeds and creates habitat for beneficial insects and spiders. If you’re growing vegetables, go for natural configurations that help the plants help each other. The most often cited example is the Three Sisters garden, in which squash, corn, and beans help keep each other healthy through mutually beneficial relationships. The corn provides a stalk for the beans, the beans fix nitrogen in the soil, and the squash acts as mulch. See The Urban Homestead or Gaia’s Garden to learn how to do it, or check out Kai Chang’s blog for updates on his garden. Another way to stack functions is through a polycultural bed, in which seeds are scattered so that vegetables come up in no particular pattern. The random placement of beans means that you don’t need to rotate your crops to amend the soil, and the close proximity of plants shades the ground so that the temperature is regulated and moisture is preserved. Again, see Urban Homestead or Gaia’s Garden.

Think about stacking functions in terms of landscaping, too. Why plant some anonymous hedge when a rosemary bush is edible and produces adorable flowers? If you’re looking for border plants, why not plant strawberries or chives, both of which also flower? If you never use your lawn, why have one at all? Edible landscaping, polycultural beds, or a fruit or nut tree can look just as nice (better, in my opinion) as grass. And if you take your climate into consideration when you’re planting, it’ll take much less work to care for your garden.

It’s also important to make sure that multiple plants are meeting a particular need, in case something happens to one of them. If you want to grow food, don’t just grow one plant or type of crop – if it gets a disease, then there goes all your work for the season. If you live in a dry climate, don’t rely on just one source of water – use multiple irrigation and conservation methods, like a soaker hose, thick mulch, a cistern, and berms and swales.

To reduce waste, try to stack functions in the rest of your life, too. One example from my own life is transportation. When I drive my car unnecessarily, I’m wasting both gas and time; notice that the car is only performing one function. If, however, I ride my bike, now I’m getting exercise while I travel. If I ride the bus, I can read or grade papers. If my destination is close enough to walk to, then I can listen to a Yiddish tape while I exercise and travel. Note that since most people reading this blog probably live in a car culture, the car makes sense, for now, if you’re in a hurry or if you need to carry a lot of stuff. However, since the earth doesn’t contain enough resources to sustain car cultures indefinitely, consider the virtues of animal transportation – a horse will give you fertilizer and companionship in addition to healthy transportation. (Horseback riding is a workout, right? It looks like it, at least.) Also note that this form of stacking functions shouldn’t turn into an addiction to multitasking. If you’re doing more than you can comfortably concentrate on, or if it’s stressing you out, then you are canceling out the good effects of your functions.

Conversely, living in a place that gives me the option of walking, biking, taking public transportation, or driving is an excellent system of redundancies. If my car or bike is in the shop, or I’m temporarily disabled, or I don’t have time for the bus, I still have plenty of options. I’ll never be completely stranded as long as I’m traveling within my city.

Another area of your life in which you should stack functions is food. Over the past century, we’ve developed a bizarre system in which, generally speaking, pleasure and nutrition are separated from each other. We eat fast food and chips and then buy vitamin supplements. We choke down iceburg lettuce and then crave cookies and soda. The whole reason we have a sense of taste is because a good taste, absent artificial ingredients, signals good nutritional content. If the food you’re eating isn’t both pleasurable and nutritious, then there’s a problem. It’s probably not your fault, especially if you’re low-income, but it’s a problem nonetheless. Western culture needs to drastically change its food system.

Finally, think about stacking functions in terms of space and garbage. If you have one room in your house for the guest bed, one room for each child, one room for eating, one room for watching TV, one room for entertaining guests, and one room for working on the computer, then you have too many rooms. (Full disclosure: I myself currently live in an apartment with too many rooms.) Like the lawn, all this wasted space creates a lot of unnecessary work. Can you put your desk in the guest room? Do you need both a living room and a den? Similarly, if you use a disposable cup once, for fifteen minutes, and then throw it away, that cup has only performed one function in its entire lifetime. Use a glass instead – or, at the very least, compost the disposable one and feed it to your plants. If the cup isn’t compostable because it’s plastic or has wax or poisonous dyes or whatever, then that’s a bad system.

Of course, the idea of cutting down on garbage is hardly revolutionary – but in practice, it can be maddeningly hard to pull off. This is why the best way to really start stacking your functions isn’t to simply pat yourself on the back for using canvas bags at the grocery store or travel mugs at the coffee shop, but to honestly evaluate every single object you use. If it only performs one function – or if it’s not reusable or even biodegradable – then it’s wasting space and resources. Once you realize that, you can begin figuring out what to do about it.

Self-Sufficiency Sundays: Make Ricotta Cheese!

A name like Self-Sufficiency Sundays doesn’t necessarily mean every Sunday, right? Or even most Sundays? Maybe I’ll rename it Self-Sufficiency Whenever the Hell I Feel Like It.

Okay, in all seriousness, I got waylaid for quite awhile with about ten futile attempts to make whole wheat bread. The recipe I’ve been trying over and over again – the basic whole wheat recipe from The Laurel’s Kitchen Bread Book, just doesn’t work with the flour that’s available to me. After kneading the dough for about 20 minutes, it’s supposed to become smooth and elastic; if the gluten strands remain brittle after that, the book says, you’re working with old, bad flour. Laurel must live on top of a mill or something, because I’ve tried it with three different kinds and not a single loaf has risen properly. But I’m going to try another recipe that calls for gluten flour and the creation of a sponge, so while I’m annoyed at having to buy more processed ingredients, I guess I can’t escape the food system in which I’m working.

But in the midst of my latest whole wheat loaf of disappointment, I managed to cheer myself up by making my own cheese. My husband and I went camping last weekend and left behind a half gallon of milk that I’d just bought, forgetting that we were about to leave town. The milk would have just gone bad if The Urban Homestead hadn’t had a whole section on dealing with abundance, and so I was able to give the milk a second life when we got home. (Note: the milk hadn’t yet spoiled, although it was close to it. Please don’t try this with spoiled milk.)

This recipe is incredibly simple. You’ll need:

1/2 gallon of whole, unpasteurized milk
1/4 cup of lemon juice
1/2 tsp of salt
muslin or finely woven cheesecloth
thermometer

Stir the lemon juice and salt into the milk and heat it to 185 degrees, stirring all the while. You’ll start to notice curds forming pretty quickly; as soon as it reaches 185, take it off the heat and let it stand for 10 minutes. Meanwhile, line a colander with the muslin or cheesecloth. Carefully ladle or pour the curds into the cloth, tie up the corners to form a bag, and let it drain for 30 minutes.

That’s it! You’re a cheesemaker!

I only just did this a couple of days ago, so I haven’t actually eaten any of my ricotta yet. Looks legit, though. If you want a savory cheese, mix in olive oil and herbs. For sweeter cheese, use honey and spices. A half gallon of milk doesn’t produce a whole lot of cheese – not enough for standards like lasagna – so I’m going to use mine to make an appetizer from Deborah Madison’s Vegetarian Cooking for Everyone: crostini with ricotta, olive paste, and marjoram. Then I’ll sip Chianti and talk about the latest New Yorker article while I eat it! How divine!

Self-Sufficiency Sundays: Grow Some Beans!

I CAN’T BELIEVE HOW EASY IT IS TO GROW BEANS.

I just can’t believe it.

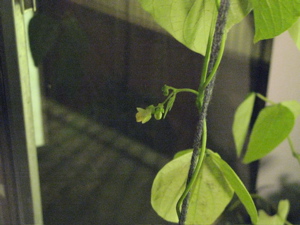
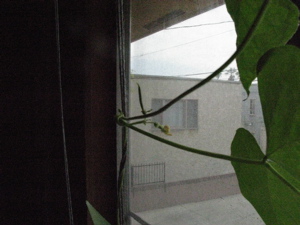
I planted some pole peans in pots in my window a few weeks ago ago to see if it’d be feasible to create a natural, edible curtain (see The Urban Homestead for a more detailed description) and they’ve gone from seedlings to this:

Image description: three beanstalks in a windowsill.  One of them reaches the top of the window.

Image description: three beanstalks in a windowsill. One of them reaches the top of the window.

Sorry for the bad photography – my mom gave me an expensive digital camera and I don’t know how to work it. But incredible, right? These things have been growing a couple of inches a day. Even better, they’re self-seeding (meaning they don’t need to be cross-pollinated by bees and other insects), so they start producing fruit as soon as they’re mature. Here’s one of the little flowers that started forming once the stalk was a few feet high:

Image description: a small yellow and white flower.

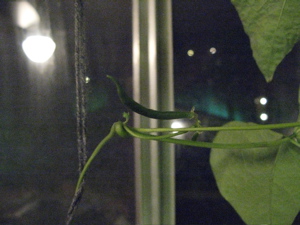
And here’s a wee bean that emerged when the flower died.

littlebean

Here’s the bean now!

beancloeup

Stir-fry, here we come.

Now, I have this problem wherein any vegetable I try to grow in a pot turns into a bonsai vegetable – so far, I’ve given up on my bonsai spinach, bonsai lettuce, and bonsai scallions. Some problem with root space, I guess, I don’t know. So I’m bracing myself for the possibility that these beans won’t get any bigger. If they do, though, I’ll have to get some stronger strings.

To grow your own bean curtain, you’ll need:

– runner beans (NOT bush beans)
– enough large pots to cover a windowsill
– potting soil
– a paperclip
– a ceiling hook or nail
– yarn, twine, or other thick string

Beans will only germinate in warm soil, so choose a sunny south-facing window. (Planting them here has the added benefit of deflecting sunlight and cooling your house in the summer. Just make sure you don’t bake them – beans don’t produce much when it’s too hot.) Plant them about an inch deep in damp (not soggy) soil. Unfold the paperclip so that it looks like a U, and stick it into the soil about an inch away from the bean so that there’s a little metal loop sticking up. Feed the string through the loop and tie it onto the ceiling hook. (Right now I’m using pushpins, which I know is an astronomically bad idea. I’m currently searching for alternatives that won’t get me in trouble with the landlord.)

That’s… uh, pretty much it, actually. Keep the soil moist (dig down a couple of inches before you water it, since surface soil is often much dryer or wetter than deeper soil), give it a little organic potassium-rich fertilizer if you want, and just watch the magic happen. Remember to pick each bean when it’s still young and tender. The flavor will be better that way, and the plant will keep producing as long as it perceives its beans disappearing.

If you’ve got a yard, you can build a bean teepee. Just take a bunch of long poles, stake them into the ground and tie them together on top, and plant 3 or 4 beans around the base of each one. If you make several small ones, your kids will love you forever, and if you make one big one, you can spend your May weekends reading Walden in your leafy getaway.

Or, if you live in a warm climate, consider using runner beans for Sukkot. You’ll have to do some advance planning here. Build your sukkah out of trellises or poles about two months before Sukkot, and plant the beans around them. You may want to hold off on the roof at first, just to make sure the beans get enough sunlight. If all goes well (keep in mind I’ve never tried this), the walls will fill themselves in gradually, and you can eat your first harvest on the first day! After the vines have stopped producing, simply use them for mulch or compost when you tear down the sukkah. I know having your sukkah up for like three months is a significant departure from Jewish tradition, but I mean, hey, beans. Just think about that. Besides, Sukkot is a harvest festival anyway, and there’s something beautiful about shelter that builds itself.

In conclusion, beans beans beans, I love them. The end.

Self-Sufficiency Sundays: Knit a Sweater!

Okay, hear me out. I know you think knitting is just for privileged hipsters who want to show off how alternative they are by dropping a hundred bucks on silk/wool blends and then pulling it out on the bus. I know you think that any knitted garment that actually looks good probably takes a thousand years, not to mention superhuman talent and dexterity, to make. I know you guys think knitting is just for women. I know you think knitting is too expensive, too time-consuming, too hard on your carpal tunnel to be worth the trouble.

Well, the carpal tunnel I can’t help you with, but knitting doesn’t have to be expensive and time-consuming.

Here’s the deal with the sweater you bought at the mall. Each of its components – the fiber, the yarn into which the fiber has been spun, the pieces of fabric, the stitches that hold them together, the buttons, the tag – has most likely been produced by sweatshop workers. Sweatshops have become a fact of American existence. Virtually every item we wear is made by laborers somewhere on the spectrum of exploitation, whether they’re living in near-prison conditions in another country or being sexually harassed and prevented from organizing at the American Apparel building in L.A. Sweatshops don’t go away every time some celebrity launches a PR campaign against them; they’re too ingrained in the American economy, too invisible for most people to care about.

Not that the yarn and notions (buttons, zippers, needles, etc.) you buy to knit with are reliably better, unless you’re paying twenty dollars a skein for yarn spun and dyed by the sheep farmer who sold it to the yarn store. But see how many steps you slice off the chain of exploitation when you buy the garment at an earlier stage in its development? No, you won’t have the sweater as quickly as you would if you bought it finished, but you’ll know that the person who put the most work into it – you – was treated fairly.

Unfortunately, the two main problems with knitting – money and time, as I’ve mentioned – are formidable. This is because it’s still mainly considered a hobby. Stores only stock luxury yarn because, come on, you’re doing it for fun, right? And who cares if a pair of socks takes you three months – you’re only pulling it out when you feel like it! There are ways to get around these problems, though, and they both involve community. If you need 700 yards of a certain yarn to knit your sweater, but each of the 7 skeins you’ll need costs ten dollars retail, get together with a few people and try to buy a bag of it wholesale. Also, remember that more utilitarian yarns like acrylics do exist, even if the owner of your local yarn store wouldn’t touch them with a ten foot pole. (I was about to say “ten foot knitting needle.” See how much I care about you, that I refrain from the most painful jokes?) If time is a factor, consider buying a knitting machine. Again, community is key here. It doesn’t make sense for 10 people to each own a machine (or multiple machines – I think you have to buy a separate one for each weight of fabric you want to produce) when they could all easily share one. What if machines were housed in public spaces, so that people could rent out slots of time to work on them?

Notice that when we’re talking about the basic act of clothing ourselves, the gendering of knitting seems to fall away? You need to keep warm, right? So cover yourself. If you dudes still need convincing, check out menwhoknit.com or the patterns in Debbie Stoller’s Son of Stitch ‘N Bitch, a book dedicated to projects for men. (Unfortunately, the book is aimed at women who knit for men. This from the editor of a prominent feminist magazine.)

Now, the title of this post is “knit a sweater,” but if you’ve never knitted before, you probably want to start off with something easier. How about a potholder? This project will give you the chance to make what’s called a swatch, which is a square piece of knitted fabric that allows you to see how big your stitches are using a given pair of needles. Swatches are vital for larger projects like sweaters, where you need to match your gauge to the one stated on the pattern so that your garment comes out the right size.

To make a very simple potholder, you’ll need a pair of… let’s say size 10 needles, and a basic acrylic cotton yarn. The needle size doesn’t matter all that much, but 10s are big enough that you can clearly see what you’re doing.

I’m not going to reinvent the wheel by teaching you to cast on, make a knit stitch, and bind off, because a million other people have done it already. Youtube has a wealth of instructional videos like this one; one Google search will give you tons more. The best book I’ve found to learn the basics (and the one that I still consult whenever I come across something unfamiliar in a pattern) is Debbie Stoller’s Stitch ‘N Bitch, also known as Mother of Son of Stitch ‘N Bitch. Many yarn stores offer classes, if you’d rather have a real person teach you.

To make your potholder, cast on 30 stitches. That very first row of stitches will be about half the width of the finished swatch. Knit 30 rows in garter stitch, bind off, and then use the yarn that’s hanging off the end to make a loop so you can hang your potholder up. The other end of the yarn can be woven into the fabric (see Stitch N’ Bitch or other instructions). That’s it! So easy! Now, every knitter’s gauge (the size of the stitches you produce) is different, so you may have produced a potholder that’s either way too big or way too small. Just knit it over again, adding or subtracting stitches beforehand to get the size that you want. It’s good practice. Now you know why you need to do this before you knit an entire sweater.

Next, learn the purl stitch. Then you can make a ribbed scarf. Ribbing means that you alternate between knits and purls to give your fabric an extra stretchy striped look. If you’re wearing a sweater right now, look at the cuffs of your sleeves. If you’re in the southern hemisphere, look at the collar of your T-shirt. See how there are columns of arrow-looking stitches between columns of bumpy-looking stitches? That’s ribbing.

After that comes the fun stuff like cables, lace, and color knitting like fair isle. I’ll tell you right now: it’s jaw-droppingly easy. All of it. You know that amazing shawl of your great aunt’s that had this sort of fern pattern sticking out of the fabric? That was easy. Most things require a few additional techniques like increasing and decreasing, but the only two stitches you’ll ever use are knits and purls.

But I digress – the sweater. My advice is to make a baby sweater first; that way you can learn how it’s constructed without worrying too much about how it’ll look on you or whether it’ll have been worth all that yarn you bought. Unload that sweater on an expecting friend, or save it for your young’un.

As for your own sweater, I’m not going to suggest a specific pattern for you, because you really need to knit something you like – otherwise you’ll never be excited enough about it to finish. A former roommate of mine made the Skully sweater from Stitch N’ Bitch (a loose, unisex sweater with skulls and crossbones on the sleeves). I myself am currently working on this cardigan from Knitty.com, with purple and blue stripes instead of green and blue. And you know what? I’m very tempted to try and make my own buttons to go with it.

The revolution will not be store-bought!

Self-Sufficiency Sundays: Grow Herbs From Seed!

From Little Herb Gardens by Georgeanne Brennen and Mimi Luebbermann:

The almost-instant gratification received from growing arugula, cilantro, or dill is reason enough to plant them. Each sprouts and grows quickly. Arugula leaves pop through the soil in three or four days. Success appears before your eyes. Cilantro emerges shortly thereafter, in five or six days, while feathery dill tips come through the soil in about ten days. Any of the three can be put to use within a few weeks, to flavor salads, soups, and sauces and to sprinkle on pizzas and sandwiches. Grow any or all of these herbs in small, window-sized pots, and replant with fresh seeds after a couple of months. A steady supply of succulent, tender leaves is your reward. Spring and fall produce especially good harvests. All three herbs quickly send up central stalks, flower, and go to seed during summer, and in winter germination is slower. Arugula is also called rocket, garden rocket, and roquette. Cilantro is also known as Chinese parsley and coriander. Continue reading

Self-Sufficiency Sundays: Keep Your Soil Healthy!

Quick note: I’m probably going to start doing these biweekly. Little easier on my schedule.

I don’t think I need to tell you that healthy soil leads to healthy plants. Is your soil light in color, dry, hard and impacted, or dusty and crumbly? Do your plants always wilt and die as soon as the fertilizer’s used up? Is there a patch in your garden (I know you don’t have a lawn!) where nothing ever grows? Do your potted plants never seem to do well? You’ve got some bad soil, my friend.

Here’s a rule of thumb: healthy soil is living soil. Healthy soil is teeming with microbes, fungi, worms, insects, and other beasties; unhealthy soil is uninhabited. Soil life is what causes decomposition, which releases nutrients for plants; healthy soil can’t help but fill itself with plant life as seeds are deposited by wind and larger animals. Unfortunately, our current agricultural practices – on both large and small scales – both discourage soil life from forming and actively kill it off. There are four things you can do, though, to encourage the critters to reinhabit your garden or pots: give them good water, fertilize with compost, refrain from chemical pesticides, and mulch each surface.

1. Water.
Most tap water is chlorinated. Chlorine, as any Orange Country resident knows, is the stuff that you pour in your pool to keep the sides from turning green. You do this because chlorine is a poison. When you put it in your pool water, it kills the algae; when you pour it on your plants, it kills all the soil life.

So here’s what you do. If you’re in an apartment and are just dealing with potted plants, fill your watering can or another container with tap water and let it sit, uncovered, for 24 hours. All the chlorine will gradually evaporate into the air. When I started doing this, I didn’t notice any huge surge in growth, but the pots did seem to retain their moisture a lot longer. (A quick note on potted plants: soil doesn’t have time to soak up the water if you just slosh some in there and let it run through; furthermore, any water running out the bottom of the pot takes nutrients with it. Water your potted plants at least two or three times, catching the water in a reservoir beneath the pot and pouring it back in.)

If you have a house and a yard, consider installing a cistern to catch rainwater. A cistern is basically just a big barrel positioned under the downspout that leads from your rooftop gutter. Just make sure that if you have an asphalt roof, you install what’s called a foul flush system so that you don’t get toxins in your water. For more detailed instructions, see Scott Kellogg and Stacy Pettigrew’s Toolbox for Sustainable City Living.

2. Compost.
The ecosystems found within soil are incredibly complex, and the nutrients they provide plants are correspondingly so. Conversely, the nutrients in chemical fertilizer are reduced to three main elements (nitrogen, phosphorus, and potassium) plus a few extra chemicals thrown in for good measure. Recreating natural fertilizer in a lab is the equivalent of trying to put together a puppy. You can try, but instead of this:

a labrador retriever puppy.

Image Description: a labrador retriever puppy.

You’ll probably get this:

Sonys robot dog, the Aibo.

Image description: Sony's robot dog, the Aibo.

Just… not… the same.

(Oh, how I wanted to find a clip from Futurama’s Robo Puppy episode. “Robo Puppy commencing cheek licking! Licking in progress! Licking complete!” Classic.)

Luckily, you don’t need that jar of Miracle-Gro anyway, because compost has all the microbe-produced nutrients your plants need. If you’re not sheet mulching (more on that later), adding compost to your soil will keep it full of natural plant food. And as an added bonus, the soil life will attract more soil life, making your ecosystem even richer! A few weeks after I added my worms and garbage to the compost bin in my garage, I opened it up to find pill bugs crawling through the castings.

3. Pest Control.
To some extent, healthy soil itself will cut down on pests, since with all those species either in the soil or attracted by the soil, there’s bound to be a natural predator or two. Pests are naturally drawn to weakened plants, so if you’ve got a healthy garden, you probably won’t need much spray. But I’ve found that potted plants seem to be more susceptible to pests – especially my indoor ones, maybe because aphids can fit through the window screen but ladybugs can’t – so you may have to do a little maintenance now and then. Like chlorine, pesticides are poisons, and kill everything on contact, including beneficial soil life. Constantly spraying crops with poison only exacerbates pest problems; the soil life and predators die, making the plants even more vulnerable, and the pests, which are quick-breeding and more resilient than predators, come right back in even greater numbers.

The best thing is to try to attract natural predators with mulch (great for tiny spiders) and flowers (loved by ladybugs). But, like I said, in some cases you’ve just got to spray. In that case, try to use an organic spray with natural ingredients – these will suffocate the pests. You’ll still kill some beneficial life, but you won’t render the soil uninhabitable.

4. Mulch.
In dry climates, exposed soil is scorched, lifeless soil. In wet climates, exposed soil is probably not occurring very much, because it’s full of seedlings. Keep your soil moist! A layer of dried leaves or wood chips regulates the temperature and keeps moisture from evaporating. Sheet mulch, which is a thick layer of “green” (manure, kitchen scraps, etc.) and “brown” (dried leaves, paper, or wood) composting materials, actually creates compost and builds soil as organisms eat it and poop it out. Toby Hemenway describes it pretty thoroughly in Gaia’s Garden. Finally, groundcover plants, such as clover, function as a living mulch.

Self-Sufficiency Sundays: Make a Compost Bin!

Composting is one of the easiest things you can do to reduce your dependency on food and waste systems, and I’d be remiss if I didn’t include instructions on how to make it happen. Being an apartment dweller, I have no idea how traditional compost piles work, but I have become quite comfortable keeping a worm bin in my garage. Here are some instructions from Jewcy for a simple under-the-sink affair:

Ingredients:

* 1 Plastic Bin (with lid). Surface area is more important than depth, but you’ll probably want something small enough to fit underneath your sink.
* Shredded Newspaper (no color). Best to use a paper shredder, but hands work ok too. About 1 Sunday New York Times worth should suffice.
* Worms! The best worms for composting are red worms, either Eisenia foetida or Lumbricus rubellus. Worm Mans Worm Farm will sell you 1000 worms at the reasonable rate of around $25.
* Compostables. You can compost fruit and vegetable scraps and peels, coffee grounds, tea bags and rinsed out, crushed up egg shells. Avoiding meats, dairy products and oily foods will help prevent against odors, flies and other pests.

Process:
Drill about 12 – 16 holes in the plastic bin, about two thirds of the way up from the bottom. This will provide oxygen to aid in the compost process. Some people also puncture holes in the bottom to allow for drainage, though if you’re keeping this under your sink you may prefer to skip this and avoid dealing with a drainage system altogether.

Run the shredded newspaper under water until it is thoroughly soaked, then ring it out so that it is moist, but not dripping. Spread about half of this newspaper evenly along the bottom of your bin, then dump your worms over the paper, distributing them in a similar manner. Finally, cover your worms with the remainder of the shredded, damp newspaper.

Maintaining Your Compost:
There is very little to do to maintain a compost, though after a few months you will have a buildup of finished compost that can be used as fertilizer, and most of your original bedding (newspaper) will be gone. The best way to replace the fertilizer with new bedding is to move all of the finished compost over to one side, then replace the bedding on the other side and begin adding compostable scraps to that side. Gradually the worms will move from the finished compost, at which point you can remove it and dump it in your garden, your plants, or that patch of dirt outside where grass never seems to grow.

For more information on composting, check out Worms Eat My Garbage by Mary Appelhof.

My compost bin is a little more complicated – instead of one bin, I have two that fit into one another. When the compost is ready, I put in the second bin, fill it with fresh bedding and food, and then wait for the worms to migrate up through holes drilled in the bottom. See Coyne and Knutzen’s The Urban Homestead for instructions.

Self-Sufficiency Sundays: Hankies and Hand Towels!

Here’s a rockin’ awesome way to save paper: carry your mucus around in your pocket! Ha ha ha! No, seriously.

Using a handkerchief instead of tissue is a really easy way to reduce your waste. At first glance, it may seem gross to put that snot-rag back in your purse instead of throwing it away, but a) human mucus is mostly water, and b) if you’re anything like me, you carry the Kleenex around for a million years anyway. To wash it, simply rinse it with water and hang it up to dry. (If you have a wicked head cold or a nosebleed, no one will fault you for switching back to disposables. Although I do wonder if you could toss pathogen-laden tissues in your composting toilet.)

Plus, using a hankie gives you an excuse to learn embroidery! Ooooh:


(Image description: a multicolored sparrow silhouette within an embroidery hoop. “12-18” is embroidered in the top left corner.)

(Via Our Descent Into Madness.)

Once you’re hankie-savvy, why stop there? When I was in Japan, I noticed that none of the public restrooms had paper towel dispensers. This baffled the hell out of me until someone explained that everyone just carries little towels around with them. Next time you’re in a public restroom, take a peek into the trashcan and imagine how much waste could be avoided if we all stopped using paper towels. Especially since we throw them away after wetting them with clean water.

Since I’m no longer in Japan, I’m not sure where to buy the little restroom towels, but a washcloth or tea towel would work, I guess. One note, though: get the towel out before washing up. I’ve ruined more than one important paper rummaging through my purse with dripping hands.

Self-Sufficiency Sundays: Grow Some Lettuce!

From The Urban Homestead by Kelly Coyne and Eric Knutzen:

This is a good first project for a beginning farmer. Lettuce is easy to grow, and tastes so much better homegrown than from a bag. Better still, it is always fresh when you want it, instead of rotting in crisper drawer (sic).

It is easiest to grow lettuce in cool (but not freezing) weather. Lettuce is not a sun worshiper. In climates with freezing winters, you should plant lettuce in the early spring. In warm climates you can plant it in the fall as soon as the summer heat dies down, or any time over the winter.
Continue reading